

 |
| step 1. make an 8 sided poly sphere |
 |
| step 2. duplicate + stretch for head, slightly forward. |
 |
| step 3. for arm and leg use a poly cylinder - 8 sided with no caps |
 |
| step 4. at top and bottom select the edges at 45 degree angles |
 |
| step 5. delete these edges leaving quads at top and bottom. |
 |
| step 6. do the same to the head sphere |
 |
| step 7. For neck, simple poly cylinder with 8 sides - position between. |
 |
| step 8. shape the body sphere front and back. |
 |
| step 9. select four facets at right hip and delete them. |
 |
| step 10. shape top of leg to approximate size of hole. |
 |
| step 11. combine two poly meshes and use bridge to close the gap. ( 0 divisions ) |
 |
| step 12. poly extrude two shoulder area facets a little way. |
 |
| step 13. delete the two selected faces plus the two extruded ones below them. |
 |
| step 14. edit the vertices at the top of the arm and shoulder to make a rough match. |
 |
| step 15. combine arm and body meshes. bridge the edges ( 0 divisions ) |
 |
| step 16. shape up the resulting shoulder |
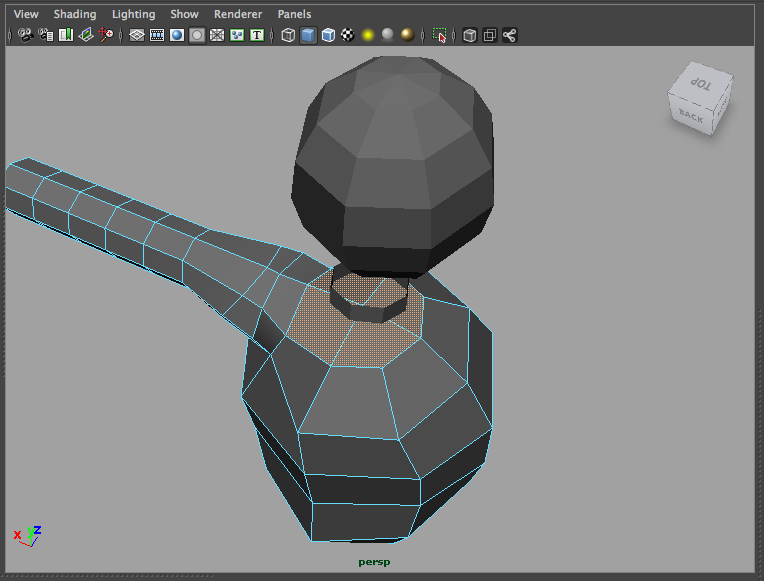 |
| step 17. delete the top four faces of the body under neck. |
 |
| step 18. combine and bridge, adjust if needed. |
 |
| step 19. from behind head choose these four faces to delete. |
 |
| step 20. move head closer and adjust vertices on neck and head to match up. |
 |
| step 21. combine and bridge head and neck, adjust if needed. |
 |
| step 22. select all faces on left side, then delete them. |
 |
| step 23. go to mirror geometry and mirror it ( on -x axis ) |
 |
| step 24. hide the body model and make a 3x3x1 cube like this for the hand. If you want four fingers make it 4x4x1. |
 |
| step 25. tweak the points to give a slight curve and a thinner first column. |
 |
| step 26. extrude the facets above to pull out a thumb and fingers. |
 |
| step 27. when hand is shaped choose 3 facets at wrist and delete them ( this should still be only 3 facets even with a four finger hand ) |
 |
| step 28. combine and bridge, adjust if needed. Check with smoothing on ( press 3 ) |
 |
| step 29. for afoot make another simple 8 sided poly sphere and position below leg. |
 |
| step 30. again select and delete front and back 45 degree edges. |
 |
| step 31. choose four facets below leg and delete them. |
 |
| step 32. shape hole in foot and bottom of leg to match edges. |
 |
| step 33. select all bottom vertices on foot |
 |
| step 34. scale vertices under the foot like this. |
 |
| step 35. insert an edge using Insert Edge Loop Tool. |
 |
| step 36. combine then bridge. then shape the foot. |
 |
| step 37. again select and delete the left sided facets |
 |
| step 38. mirror geometry again to get figure complete. |

 |
| step 39. change to a blinn material to see form and shape it up if needed using the transform tools with soft select and reflection turned on. |
 |
| with his friend who has four fingers. |
No comments:
Post a Comment